If you have a .sql file from a previous export — your own, from another host, or from a developer — phpMyAdmin can import it back into a database in a few clicks. This article covers the standard process plus the gotchas that catch most people.
Before you start
- Have your
.sql(or.sql.gz, or.zip) backup file ready on your computer. - Know the target database name and user. Either the database already exists, or you need to create it first.
- For large files (over ~50 MB), the SSH/command-line method below is more reliable than the web UI.
Step 1: prepare the target database
If you're importing into a fresh database (recommended):
- cPanel → MySQL Databases.
- Under Create New Database, type a name and click Create Database. The full database name will be
cpaneluser_yourname. - Under MySQL Users → Add New User, create a user (or reuse an existing one).
- Under Add User To Database, attach the user with All Privileges.
If you're importing INTO an existing database, skip this step.
Step 2: import via phpMyAdmin
- cPanel → phpMyAdmin.
- In the left sidebar, click the database you want to import into. The right pane should show its tables (or "No tables found in database" if it's empty).
-
Click the Import tab in the top menu.
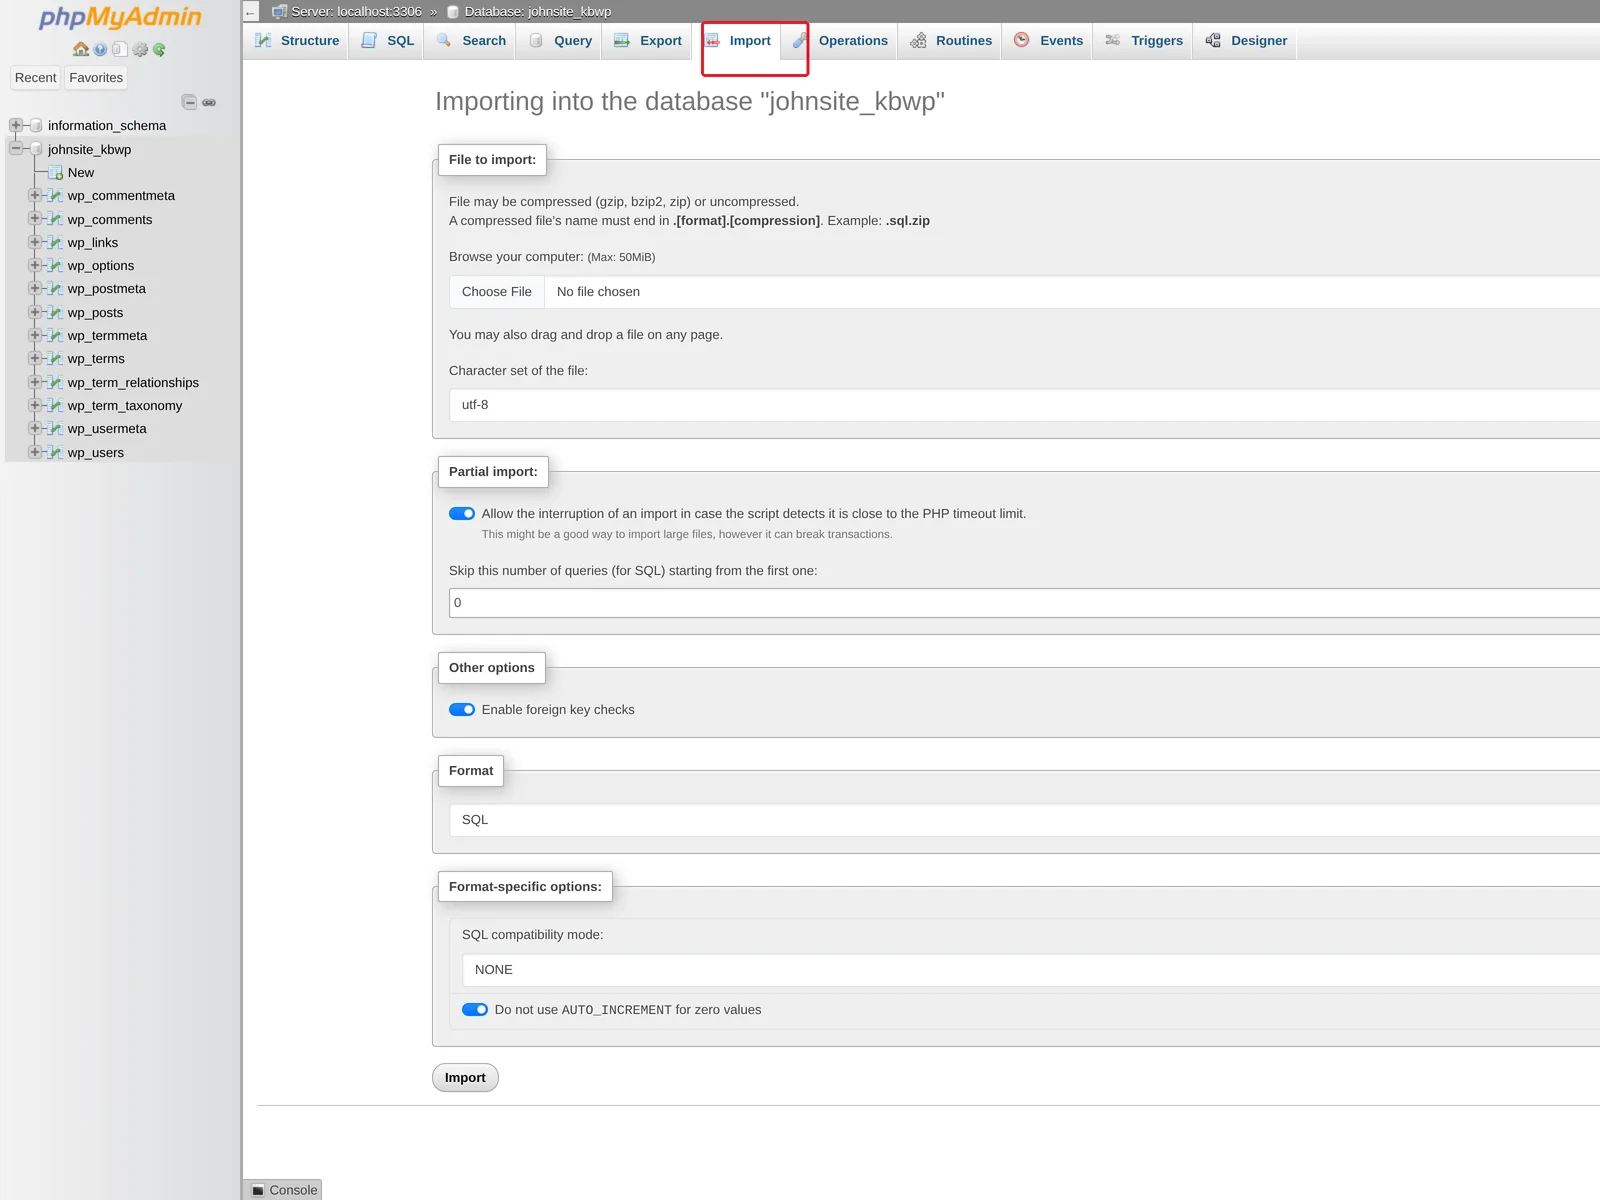
-
Click Choose File and pick your
.sqlfile. phpMyAdmin accepts:.sql— plain SQL.sql.gz— gzipped (handled automatically).zip— zipped (handled automatically)
- Leave the format as SQL. Most other defaults are fine.
- Click Import (or Go).
- Wait — large files can take a minute or two. When it finishes, you'll see "Import has been successfully finished."
The new tables and data are now in your database. Refresh the left sidebar and click into a table to verify.
Common errors and how to fix them
"#1062 - Duplicate entry"
The import is trying to insert a row that already exists (same primary key). Either:
- Empty the target database first (drop all tables) and re-import, or
- Edit the SQL file and add
DROP TABLE IF EXISTSstatements before eachCREATE TABLE(most exports include these by default if you ticked "Add DROP TABLE" during export).
To empty a database from phpMyAdmin: select the database → check all tables → from the dropdown at the bottom choose Drop → confirm.
"You probably tried to upload too large file" / "post_max_size"
The PHP upload limit on shared hosting is typically 256 MB. For larger files, use the SSH method below — or split the SQL file into chunks.
"#1064 - You have an error in your SQL syntax"
The SQL file is malformed somewhere. Common causes:
- The file is from a much newer MySQL version than ours (rare).
- The file got corrupted during download / upload (re-download).
- The file uses non-standard syntax from a specific MariaDB / MySQL fork.
If you can't get past it, open a ticket with the file attached and we'll help.
"Access denied for user"
The user you're connecting as doesn't have permission to import. Check that the user is added to the database with All Privileges in cPanel → MySQL Databases.
Importing from the command line (for large databases)
If you have SSH access, the command line handles large imports far better than the web UI — no timeouts, no upload size limits.
- Upload the
.sqlfile to your account (e.g. via SFTP to/home/youruser/). - SSH in.
- Run:
mysql -u USERNAME -p DATABASE_NAME < backup.sql - If your file is gzipped:
gunzip -c backup.sql.gz | mysql -u USERNAME -p DATABASE_NAME - Enter the password when prompted.
Adjusting WordPress / app config after a restore
If you're restoring a database from a different domain or different cPanel account, you may need to update config files on the new account so the site can connect:
- WordPress: edit
wp-config.phpand updateDB_NAME,DB_USER,DB_PASSWORD, andDB_HOST(usuallylocalhost). - Joomla: edit
configuration.phpand update$db,$user,$password,$host. - Magento: edit
app/etc/env.php. - Custom apps: wherever your app reads database credentials, update them.
Also, if the domain has changed (e.g. you migrated from oldsite.com to newsite.com), you may need to find-and-replace the old URL with the new one inside the database itself. For WordPress, this is best done with WP-CLI:
wp search-replace 'http://oldsite.com' 'https://newsite.com' --all-tablesSee Manage WordPress with WP-CLI over SSH and Change WordPress URLs in the database.
Related articles
Trouble importing a database? Open a support ticket


