Cloudflare is a global content delivery network and security service. Putting it in front of your CanSpace site gives you a free CDN, DDoS protection, basic firewall rules, and analytics — without changing anything about how your site is hosted. This article walks through the setup.
www.canspace.ca). You don't need to change your CanSpace hosting plan or do anything on our end.What Cloudflare does
When Cloudflare is in front of your site:
- Visitors connect to Cloudflare instead of directly to our server.
- Cloudflare caches your static files (images, CSS, JS) at edge servers worldwide — visitors load assets from a nearby location.
- Cloudflare's network absorbs DDoS attacks before they reach our server.
- You get a free dashboard with traffic stats, threat blocks, and basic firewall settings.
Step 1: sign up for Cloudflare
- Go to cloudflare.com/sign-up and create a free account.
- Click Add a site.
- Type your domain name (without
http://orwww) and click Continue. - Choose the Free plan and click Continue.
Cloudflare scans your existing DNS records and shows them to you. The DNS Records dashboard is where you'll spend most of your setup time:
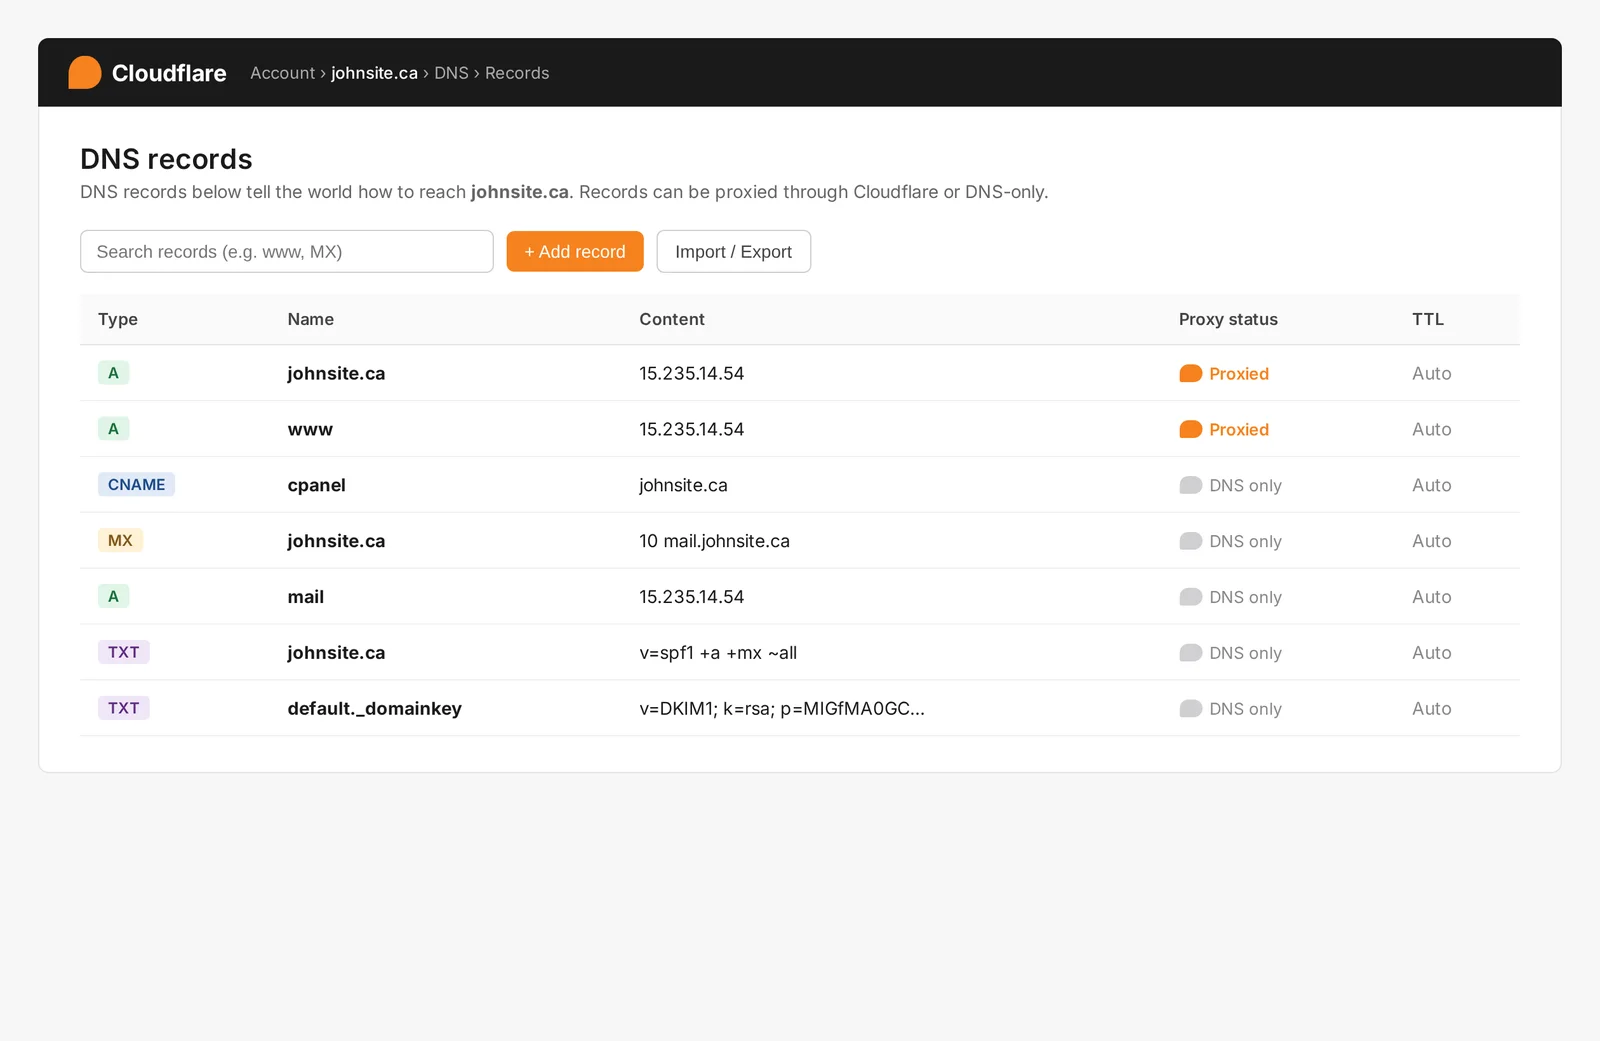
Step 2: review your DNS records
Cloudflare imports the DNS records it could detect (mostly A and CNAME records, plus MX). Compare them to your existing setup at CanSpace:
- From cPanel, look up your current DNS records under Zone Editor (or via your domain's manage page in the client area).
- Compare each record to what Cloudflare imported.
- Add anything missing — typically MX records for email, plus any TXT records (SPF, DKIM, DMARC, domain verification).
Step 3: choose proxy mode for each record
Each DNS record in Cloudflare has a "proxy status":
- Proxied (orange cloud) — traffic goes through Cloudflare. Use for web traffic (A and CNAME records for
@andwww). - DNS only (grey cloud) — Cloudflare just answers DNS queries; traffic goes direct. Use for mail (MX) and anything that isn't HTTP/HTTPS.
Default settings:
| Record type | Proxy |
|---|---|
A / CNAME for @ (root domain) | Proxied (orange cloud) |
A / CNAME for www | Proxied (orange cloud) |
| MX records | DNS only (grey cloud) — auto-set |
A record for mail.yourdomain.com (if you have one) | DNS only (grey cloud) |
| SPF / DKIM / DMARC TXT | N/A (TXT records are always DNS-only) |
Step 4: change nameservers at your registrar
Cloudflare gives you two new nameservers (e.g. maya.ns.cloudflare.com + walt.ns.cloudflare.com). You need to set these at the place where the domain is registered.
If your domain is registered with CanSpace
- Log in to the client area.
- Domains → My Domains → click your domain → Nameservers in the sidebar.
- Replace the existing nameservers (e.g.
ns27.canspace.ca/ns28.canspace.ca) with the two Cloudflare ones. - Save.
See Change your nameservers for screenshots.
If your domain is registered elsewhere
Same process at your registrar's control panel — find the nameservers section and replace them with the two from Cloudflare.
Step 5: wait for activation
Cloudflare detects the nameserver change automatically — usually within a few minutes, sometimes up to 24 hours. You'll receive an email when your site is active. The Cloudflare dashboard also shows the status under your domain.
Once active, visitors are routed through Cloudflare and you can start configuring it.
Recommended Cloudflare settings (free plan)
Once your site is live on Cloudflare, the defaults are sensible. A few changes that make a noticeable difference:
- SSL/TLS → Overview → set encryption mode to Full (strict). This requires a valid SSL cert on the origin server (we provide one via AutoSSL automatically).
- SSL/TLS → Edge Certificates → turn on Always Use HTTPS.
- Speed → Optimization → turn on Auto Minify for HTML, CSS, and JS.
- Caching → Configuration → set Browser Cache TTL to 4 hours or longer.
- Rules → create a Page Rule for
yourdomain.com/wp-admin/*with "Cache Level: Bypass" and "Disable Performance" — Cloudflare optimizations can interfere with WordPress admin.
Limitations / things to know
- Cloudflare's free plan caches static files automatically but does NOT cache HTML by default. To cache HTML pages too, you need a Page Rule or the Cache Everything setting — research this for WordPress / dynamic sites before turning it on.
- cPanel's auto-detection of visitor IPs. When traffic comes through Cloudflare, your server sees Cloudflare's IPs in logs instead of the real visitor's IP. cPanel handles this via the CF-Connecting-IP header; ask us to install
mod_cloudflareif you need real visitor IPs in your access logs. - Webmail subdomains shouldn't be proxied. Things like
mail.yourdomain.comand webmail need to be DNS only (grey cloud) — Cloudflare can't proxy non-HTTP traffic. - If you publish a SiteJet site, remember to clear Cloudflare's cache after publishing. See SiteJet publishing troubleshooting.
- Email deliverability. Cloudflare doesn't proxy mail — your MX records still go directly to our servers. So email continues to work exactly as it did before. Just don't proxy MX records.
Removing Cloudflare
If you want to remove Cloudflare and go back to direct hosting:
- At your registrar, change nameservers back to CanSpace's pair.
- In Cloudflare, you can leave the site there or remove it (Settings → bottom of page → Remove Site).
DNS propagation takes a few minutes to a few hours, then your site is back to direct.
Related articles
- Change your nameservers
- Point your existing domain at CanSpace hosting
- Mixed content warnings after enabling HTTPS
Need help setting up Cloudflare? Open a support ticket


