When you're migrating a site to CanSpace, you'll often want to confirm everything works correctly before switching your domain's DNS over. This article covers the two main ways to preview your site on our servers while your domain is still pointed at the old host.
hosts file to tell your computer only to resolve your domain to our server's IP. You'll see the site exactly as it will look post-cutover — everyone else still sees the old host.Method 1 — edit your hosts file (recommended)
Your computer's hosts file is a small text file that overrides DNS for this machine only. Adding one line tells your browser "when you want yourdomain.com, use this IP directly instead of asking DNS." The change affects only your computer; everyone else on the internet still sees your site on its current host.
Step 1 — get your CanSpace server IP
Log in to cPanel. On the right-hand side under General Information, note the Shared IP Address value. It looks like 192.0.2.42. That's the IP you'll use.
Step 2 — open your hosts file
| System | File path | How to open |
|---|---|---|
| macOS | /etc/hosts |
Open Terminal, run sudo nano /etc/hosts (enter your Mac password) |
| Linux | /etc/hosts |
Open a terminal, run sudo nano /etc/hosts |
| Windows | C:\Windows\System32\drivers\etc\hosts |
Right-click Notepad → Run as Administrator → File → Open → paste the path. Change the file filter to "All Files" or you won't see hosts. |
Step 3 — add a line for your domain
At the end of the file, add a line in this format (replacing the IP with your server's IP and yourdomain.com with your actual domain):
192.0.2.42 yourdomain.com www.yourdomain.com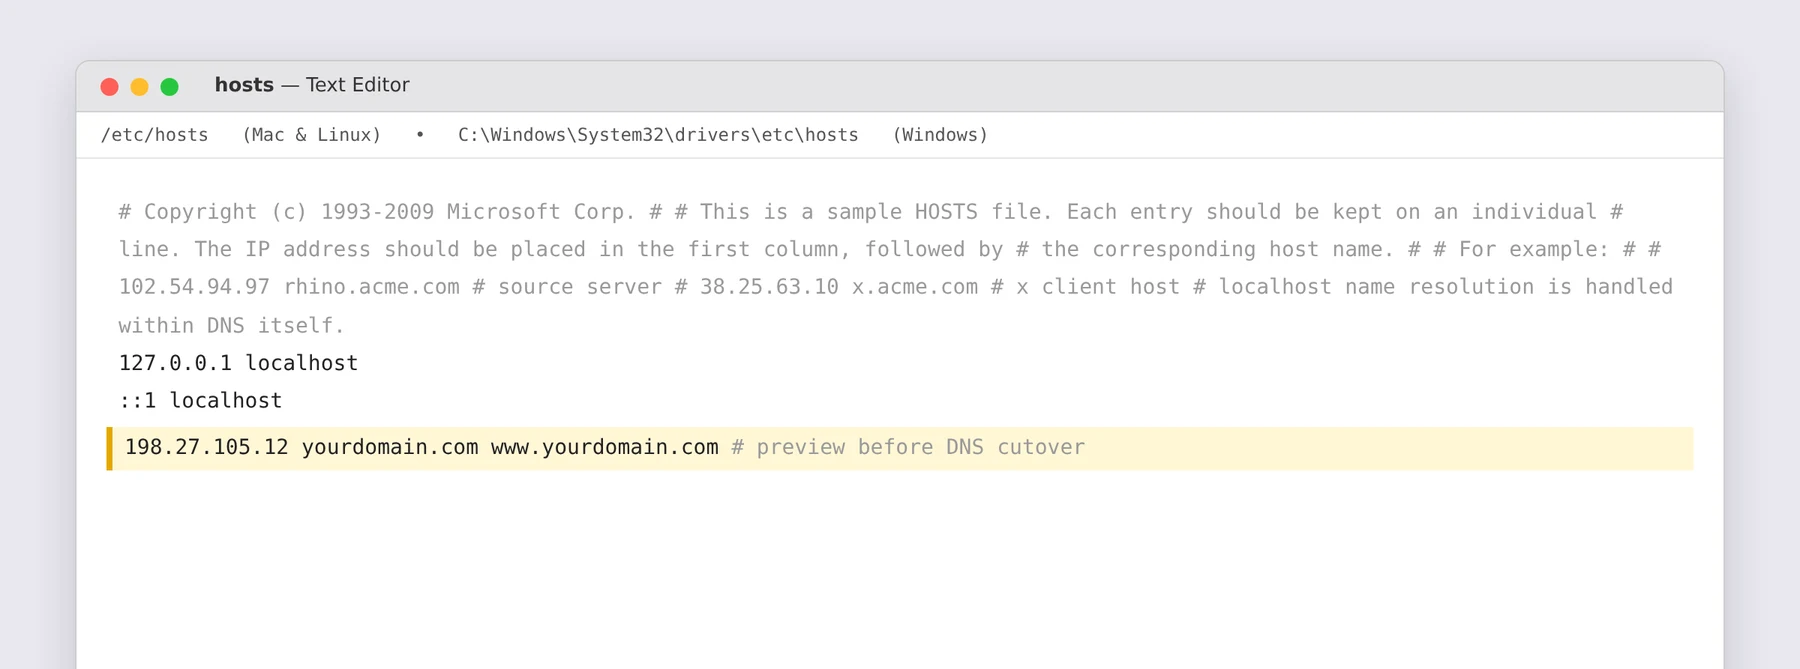
Save the file. You may need to enter your password again (macOS/Linux) or confirm the save to a protected location (Windows).
Step 4 — restart your browser
Close all browser windows and reopen them. Visit yourdomain.com — your browser now resolves that name to our server and loads the site as it exists on CanSpace.
Step 5 — undo when you're done
After you've verified everything looks correct and updated the real DNS at your registrar, open the hosts file again and remove the line you added. Restart your browser to flush the entry.
- macOS:
sudo dscacheutil -flushcache; sudo killall -HUP mDNSResponder - Windows:
ipconfig /flushdnsin Command Prompt - Linux (systemd-resolved):
sudo systemd-resolve --flush-cachesor reboot thenetworkmanagerservice - Chrome: visit
chrome://net-internals/#dnsand click Clear host cache
Method 2 — use a third-party preview service
Services like hosts.cx act as a proxy: you enter your domain and the CanSpace server IP, and they give you a temporary URL that loads your site as if DNS were already cut over.
This works for quick visual checks. But it has limitations that make editing your hosts file more reliable:
- Some content management systems (WordPress in particular) read their own configured URL and may redirect away from the proxy URL back to the real domain.
- Form submissions, logins, and anything that posts back to the server often don't work through the proxy.
- SSL certificates won't match the proxy hostname, so you'll see security warnings.
- The service has no way to support email, FTP, or anything non-HTTP.
Hosts-file editing has none of these caveats — the browser genuinely thinks the domain is at the new IP, so everything works exactly as it will post-cutover. It's a little more involved to set up, but it's the authoritative test.
When to use each
- Static HTML site / simple landing page: either works. Third-party preview is fastest if you just want to confirm the files are there.
- WordPress / Joomla / any CMS: use the hosts file. CMSes configured with an absolute URL won't work correctly through a proxy.
- Form-based site / online store: use the hosts file. Form submissions and checkout flows need to post back to the same domain the browser thinks it's on.
- Testing SSL: only the hosts file method gives you a real SSL check against the domain name.
Keep your current host's email live during the test
If you're previewing with the hosts file before DNS cutover, your email still flows through your current host, even if you're reading this article on the CanSpace-hosted version of your site. Hosts-file overrides only affect your browser; actual email clients still use real DNS (MX records) to find your mail server.
The big picture of a safe cutover
- Migrate your site to CanSpace (we do this for free with any hosting plan — see our migration article).
- Use the hosts-file method to confirm the site looks and works correctly.
- If anything's off, fix it while your real visitors still see the old host — no downtime.
- When you're confident, update the nameservers or DNS records to point at CanSpace (see How do I change my nameservers?).
- Remove the hosts-file entry so you're seeing the same thing your visitors see.
Related articles
- How do I change my nameservers?
- How do I transfer a domain to CanSpace?
- How do I manage DNS entries?
Still stuck? Open a support ticket


